Knowledge Base

Apple iPad Mini 2nd generation screen (digitizer) repair

These are some of the steps involved in completing an Apple iPad Mini 2nd generation screen repair.  Note that often it is not the LCD screen that is cracked, but the Gorilla glass digitizer that sits on top responsible for providing touch functionality to the device.

iPad Mini screen repair 01

Partial removal of the digitizer overlay module using a heatgun on low heat as the module is glued in place.


iPad Mini screen repair 02

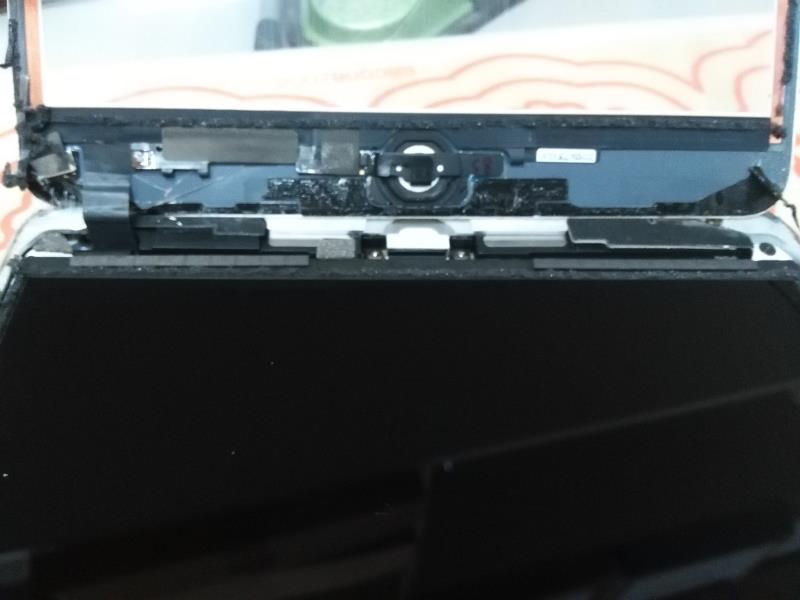
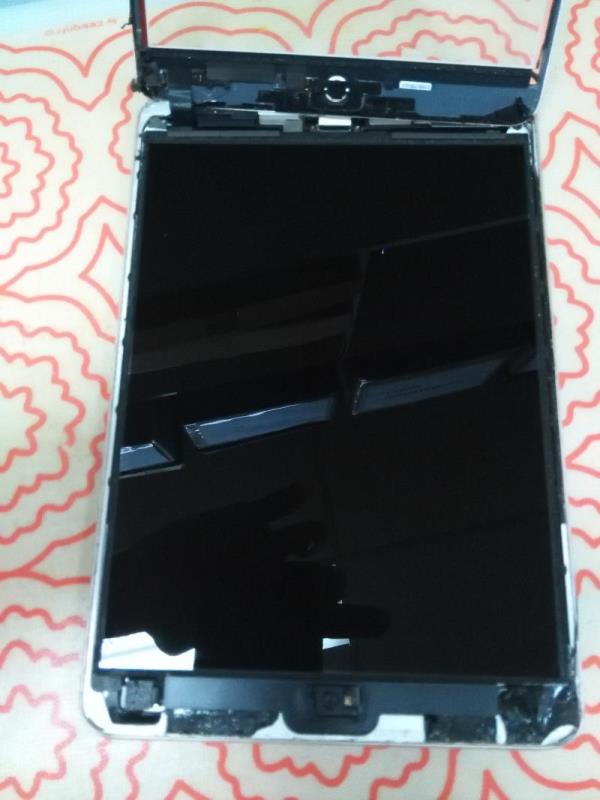
Close up view of digitizer module.  Note the flatribbon connector cable in the corner of the digitizer module and the tape covering parts adjacent to the home button.  Note the two strips of tape on the LCD screen acting as a hinge.


iPad Mini screen repair 03

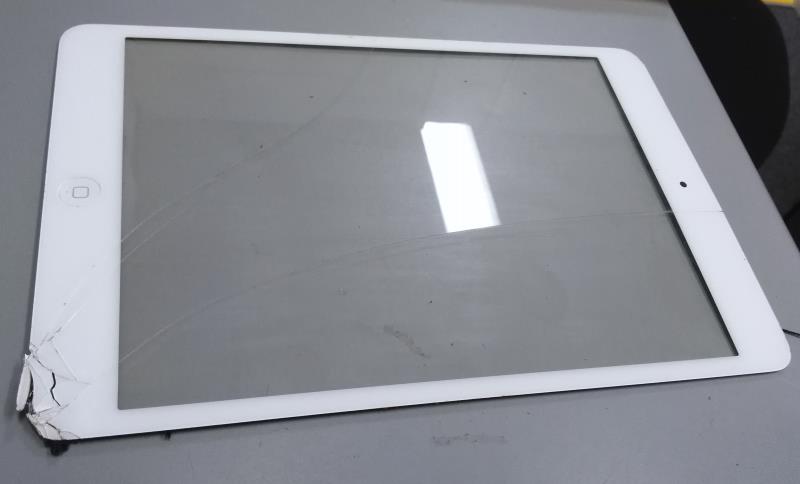
Cracked digitizer module removed.


iPad Mini screen repair 04

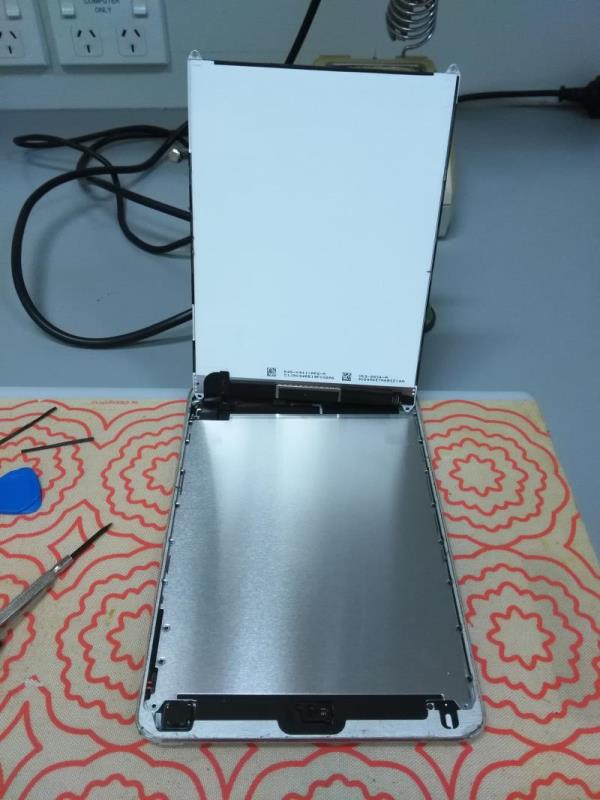
LCD screen hinged upwards exposing the aluminum tray.


iPad Mini screen repair 05

LCD screen and aluminum tray removed.


iPad Mini screen repair 06

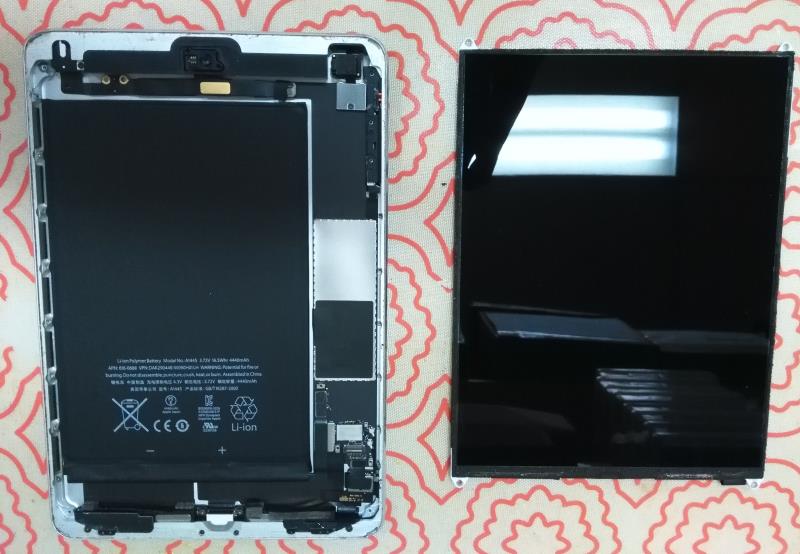
Apple iPad mini 2nd generation and LCD screen side by side.  This device had suffered accidental damage where it was dropped onto the floor causing the screen to crack.  Note the rounded corners of the device have all been returned to their original shape to ensure a good fit of the replacement screen (digitizer).


iPad Mini screen repair 07

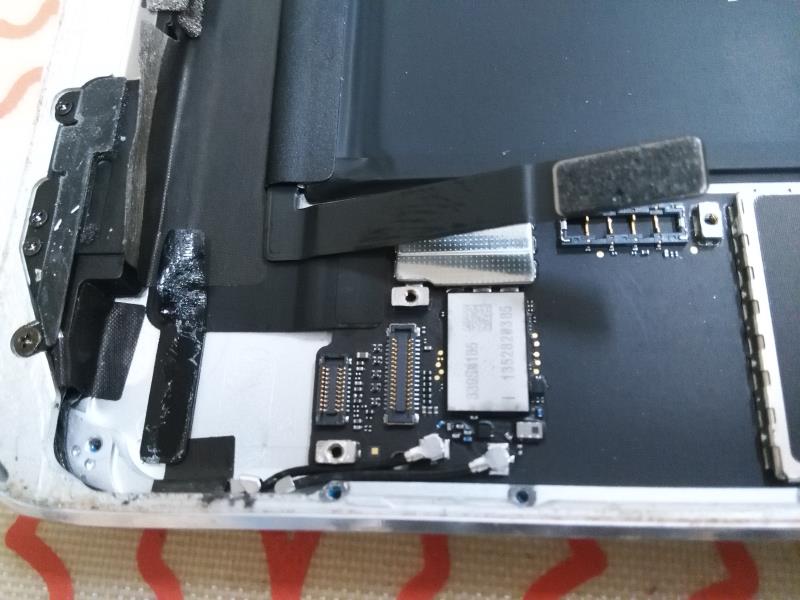
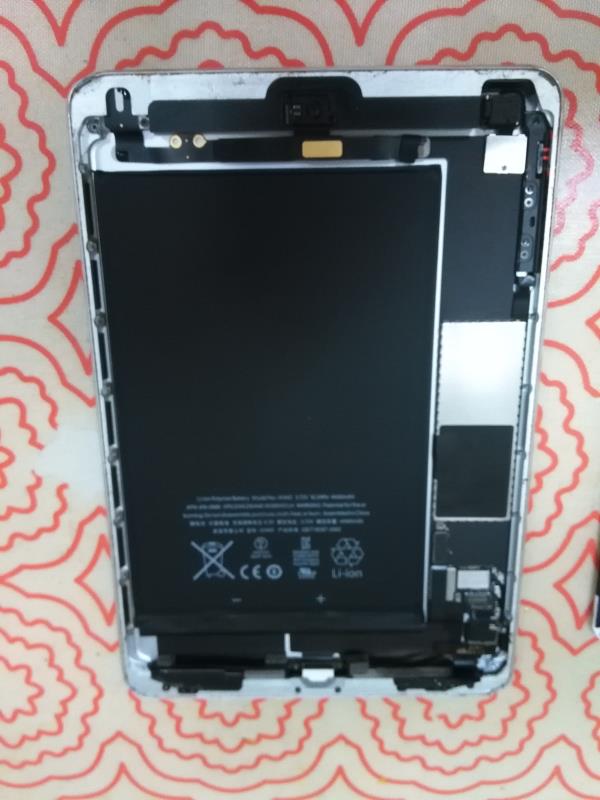
Close-up view of digitizer module connector, LCD screen connector and battery connector.

Common mistakes (iPad Mini)

Shutdown the device properly first

When you press the wake/sleep button in the top right corner of the iPad, the device remains powered.  The wake/sleep button is not an on/off button as such.  You need to hold the wake/sleep button for a few seconds and then confirm you want to power off the device.

Disconnect the battery before disconnecting the LCD display connector

If you remove the LCD display connector whilst the battery is still connected, you almost certainly will blow a fuse.  This fuse protects the sensitive electronics in the LCD display from power surges.  It is easier and cheaper to replace a fuse than to replace a costly LCD screen.  Replacing the extremely small surface mounted fuse requires specialized skills in handling and soldering.  This fuse is located on the iPad internally and will be damaged when the LCD display is disconnected from the device.  This is the number #1 cause of failed screen repair jobs.

Cheap and low quality aftermarket digitizers

There are a lot of low-quality aftermarket digitizers available for sale on the internet.  The original digitizer has copper colored metal strips on the back, not silver colored metal strips.  The original digitizer is made of Gorilla glass, a of specialized toughened glass designed to be thin, light and damage-resistant.  When ordering a replacement digitizer make sure the correct connector is included as well as good quality replacement adhesive strips.

Magnets

Don’t forget to put back the magnets – these are used to attract the magnets in the flap of your smart cover to keep the flap closed.

Home button

Don’t forget to transfer the black tape masking the exposed metal contacts on the Home button.


Apple iPad Mini 2nd generation screen (digitizer) repair was last modified: January 7th, 2016 by tabcom

Acer Chromebook 11 C730 mainboard replacement

These are some of the steps involved in an Acer Chromebook 11 C730 mainboard replacement.

Acer Chromebook 11 C730 mainboard

Acer Chromebook 11 C730 mainboard


Acer Chromebook 11 C730 flatribbon connector and wifi module

Acer Chromebook 11 C730 flatribbon connector and wifi module


Acer Chromebook 11 C730 flatribbon connector and battery

Acer Chromebook 11 C730 flatribbon connector and battery

Acer Chromebook 11 C730 mainboard replacement was last modified: December 3rd, 2015 by tabcom

Phone / tablet charging problems [solution]

Charging

Most phones or tablets come with a dedicated charger that plugs into a wall power outlet and a data lead to connect the phone or tablet to a computer.  The most common data lead used is a USB lead.  Often the data lead is used to connect to the charger as well.  USB leads can be used to provide both power and data.

When connecting your phone or tablet to a computer, some phones or tablets can be charged by using the power provided by the computer.  However, a device may draw a maximum of 500 mA of current from a port in USB 2.0 or 900 mA of current from a port in USB 3.0(!)  This is often insufficient to charge a phone or tablet (especially if the phone or tablet is turned on and left running whilst charging at the same time).

When purchasing a replacement wall power outlet charger, ensure the charger is rated for a similar voltage and current as the original charger.  USB wall power outlet chargers are typically 5V voltage and 2A current.

Backlight off

Backlight off


Backlight on

Backlight on


Backlit splash screen

Backlit splash screen

Common problems

“My device will charge properly when connected to a computer using Android 4.0.1, but not when using Android version 4.1.2 or higher.”

“When I attempt to charge my device using a computer, the device says ‘please connect charger’ and has a red cross over the battery charging indicator”.

“My device will trickle charge from a computer only when it is above 30% full; it will not charge from a computer when the battery is below 30%”

“My device will only charge from a computer when I shut it down completely”

“My device will only charge when I insert the USB lead into the computer only halfway.  This connects the charging pins but not the data pins”

“From my experience I have noticed that most Android phones will not charge over a USB connection to a computer if the battery is dead. I must be charged with a wall or car charger or have >5% battery life.”

“The screen backlight appears to be broken as the brightness of the screen is very poor.”  This is a power saving feature of your device; if the battery is low the backlight will be turned off to preserve power.  If you restart your device the boot screen will briefly appear properly lit.  If you charge the battery to 30% you will notice the backlight working properly.

Solution

  1. Purchase a high current 5V 2A USB wall power outlet charger – purchase the official same-brand replacement charger that is a 100% match for the original charger.
  2. Shutdown the device whilst charging.

Be careful when buying cheap no-name brand wall power outlet chargers from the internet as these may pose a fire hazard.

Phone / tablet charging problems [solution] was last modified: December 3rd, 2015 by tabcom