
Onlyoffice
Community Edition consists of 3 virtual machines or docker images (1: communityserver, 2: documentserver 3:mailserver) you can run on a single host.
I prefer to use Community Server together with Document Server as it requires less RAM and is more responsive. Also, you can use Let’s Encrypt for HTTPS and upgrade packages more easily. Note that Community Server and Document Server must be installed on two different servers (!)
ownCloud / Nextcloud with Document Server
https://api.onlyoffice.com/editors/owncloud
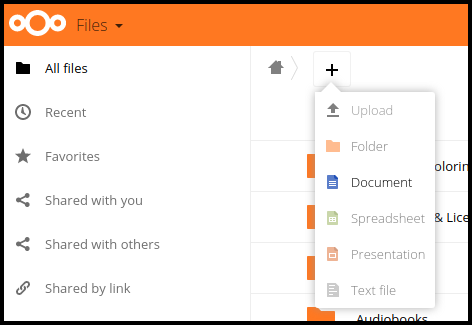
If you simply want to edit documents online using Document Server from inside your ownCloud/NextCloud web server you don’t need the Community Server.
Connect to your owncloud/NextCloud server:
cd .../apps/
git clone https://github.com/ONLYOFFICE/onlyoffice-owncloud.git onlyoffice
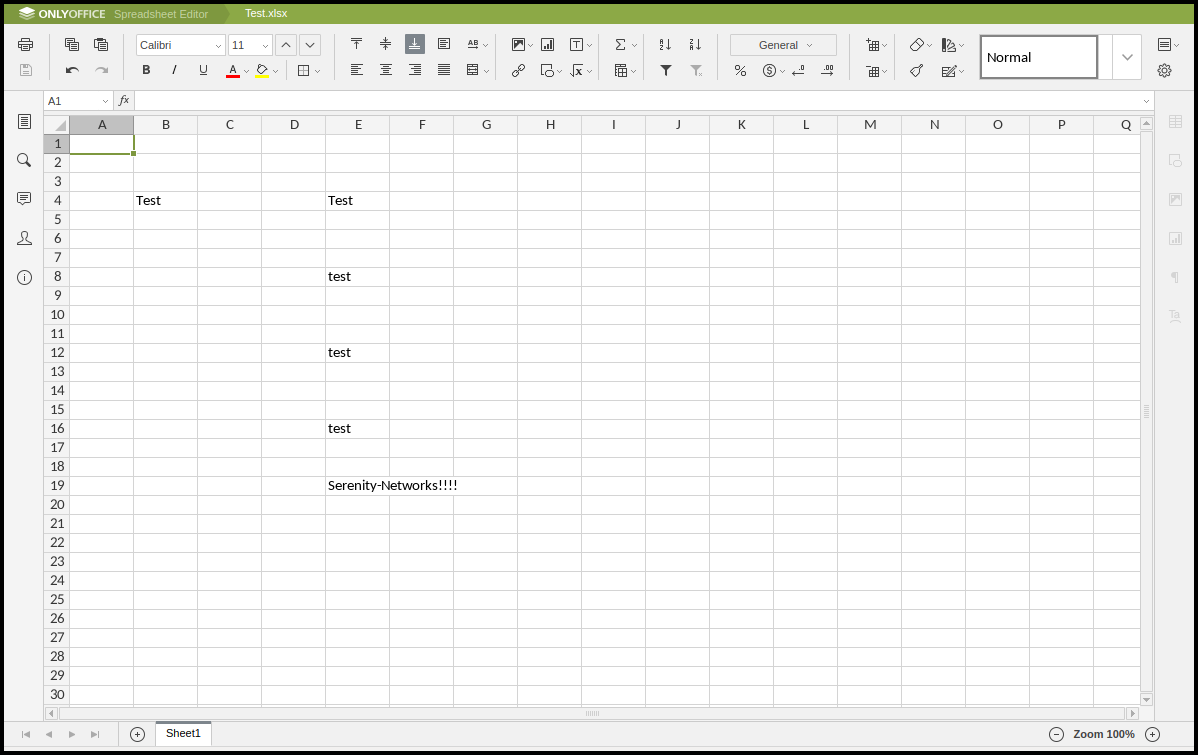
You can now configure the link to your Document Server in the settings and edit documents online from inside ownCloud / Nextcloud:
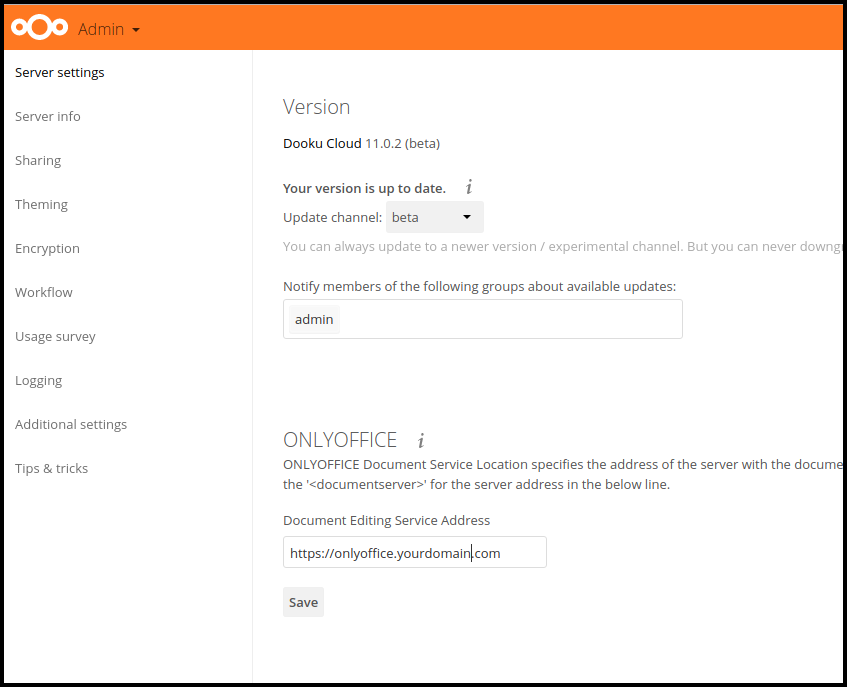
You can find the instructions how to setup a Document Server further down.
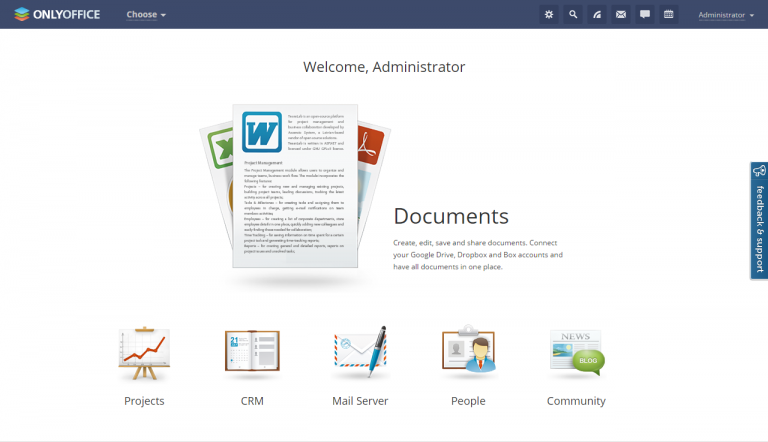
Community Server
If you want a more advanced collaboration portal you can use Community Server instead. It can connect to your ownCloud/ Nextcloud storage and also talk to Document Server for online editing of files.
https://helpcenter.onlyoffice.com/server/linux/community/linux-installation.aspx
System requirements
- CPU: dual core 2 GHz or better
- RAM: 2 GB or more
- HDD: at least 2 GB of free space
- Additional Requirements: at least 2 GB of swap
- OS: amd64 Linux distribution with kernel version 3.10 or later
- Additional Requirements:
- mono: version 4.2 or later
- MySQL: version 5.5 or later
At the moment of writing MySQL 5.7 is not yet supported but does work (as long as you have a Mysql root user password set).
Community Server uses mono (version 3.2 or later), nginx and mysql-server as database.
Follow official Mono installation instructions:
http://www.mono-project.com/download/#download-lin-ubuntu
In our case the official instructions say:
sudo apt-key adv --keyserver hkp://keyserver.ubuntu.com:80 --recv-keys 3FA7E0328081BFF6A14DA29AA6A19B38D3D831EF^C
echo "deb http://download.mono-project.com/repo/debian jessie main" | sudo tee /etc/apt/sources.list.d/mono-official.list^C
sudo apt-get update
Next step is to add the onlyoffice repository.
Note that while the package is built against Debian Squeeze, it is compatible with a number of Debian derivatives.
sudo apt-key adv --keyserver hkp://keyserver.ubuntu.com:80 --recv-keys CB2DE8E5
sudo echo "deb http://download.onlyoffice.com/repo/debian squeeze main" | sudo tee /etc/apt/sources.list.d/onlyoffice.list
sudo apt-get update
sudo apt-get install onlyoffice-communityserver
Swap file
sudo swapon --show
free -h
df -h
(ubuntu) sudo fallocate -l 2G /swapfile
(debian) dd if=/dev/zero of=/swapfile bs=2048k count=1000
ls -lh /swapfile
sudo chmod 600 /swapfile
sudo mkswap /swapfile
sudo swapon /swapfile
sudo swapon --show
sudo cp /etc/fstab /etc/fstab.bak
echo '/swapfile none swap sw 0 0' | sudo tee -a /etc/fstab
cat /proc/sys/vm/swappiness
sudo sysctl vm.swappiness=10
cat /proc/sys/vm/vfs_cache_pressure
sudo sysctl vm.vfs_cache_pressure=50
sudo vi /etc/sysctl.conf
Append to bottom of the file:
vm.vfs_cache_pressure=50
You can now access the Community server on http://ip-address
If you click on a document to launch the editor, it will not launch. For that we need a Document Server on another host:
Document Server
https://helpcenter.onlyoffice.com/server/linux/document/linux-installation.aspx
System requirements
- CPU: dual core 2 GHz or better
- RAM: 2 GB or more
- HDD: at least 40 GB of free space
- Additional Requirements:at least 2 GB of swap
- OS:64-bit Debian, Ubuntu or other compatible distribution with kernel version 3.13 or later
Additional Requirements:
- PostgreSQL: version 9.1 or later
- nginx: version 1.3.13 or later
- nodejs: version 6.9.1 or later
- libstdc++6: version 4.8.4 or later
- Redis
- RabbitMQ
echo "deb http://archive.ubuntu.com/ubuntu precise main universe multiverse" | sudo tee -a /etc/apt/sources.list
apt-get update
apt-get install curl
curl -sL https://deb.nodesource.com/setup_6.x | sudo bash -
sudo apt-get install postgresql
sudo -i -u postgres psql -c "CREATE DATABASE onlyoffice;"
sudo -i -u postgres psql -c "CREATE USER onlyoffice WITH password 'onlyoffice';"
sudo -i -u postgres psql -c "GRANT ALL privileges ON DATABASE onlyoffice TO onlyoffice;"
sudo apt-get install redis-server
sudo apt-get install rabbitmq-server
By default the server will listen on port 80. If you want to use a different port:
echo onlyoffice-documentserver onlyoffice/ds-port select <PORT_NUMBER> | sudo debconf-set-selections
Now to install Document Server:
sudo apt-key adv --keyserver hkp://keyserver.ubuntu.com:80 --recv-keys CB2DE8E5
sudo echo "deb http://download.onlyoffice.com/repo/debian squeeze main" | sudo tee /etc/apt/sources.list.d/onlyoffice.list
sudo apt-get update
sudo apt-get install onlyoffice-documentserver
Now you can connect Document Server to Community Server using Community Server web page > Settings > Document Server and update the URL address fields.
Swap File
Same as before.
HTTPS
In most cases accessing the portal via HTTPS protocol is much more secure than via HTTP which is used by default. You can easily run Document Server using secure connection. Please see the details here to learn more on how this can be done.
HTTPS using certbot (Let’s Encrypt)
Locate the link for Nginx on Debian 8 (Jessie) in our case:
https://certbot.eff.org/all-instructions/
The following instructions are courtesy of: https://serenity-networks.com/how-to-install-onlyoffice-document-server-for-nextcloud-fast-easy/
Document Server
sudo echo "deb http://ftp.debian.org/debian jessie-backports main" | sudo tee -a /etc/apt/sources.list
sudo apt-get update
sudo apt-get install certbot -t jessie-backports
certbot certonly --webroot -w /var/www/onlyoffice -d yourdomain.com
This won’t work yet as Nginx is not yet configured to accept Let’s Encrypt ‘acme-challenge’ requests.
The onlyoffice Document Server is running as the ‘supervisor’ service.
service supervisor stop
service nginx stop
cd /etc/nginx/conf.d
cp onlyoffice-documentserver.conf onlyoffice-documentserver.conf.org
This is the new ‘onlyoffice-documentserver.conf’ file. Modify the areas in bold to your needs.
include /etc/nginx/includes/onlyoffice-http.conf;
## Normal HTTP host
    server {
    listen 0.0.0.0:80;
    listen [::]:80 default_server;
    server_name _;
    server_tokens off;
## Redirects all traffic to the HTTPS host
    root /nowhere; ## root doesn't have to be a valid path since we are redirecting
    rewrite ^ https://$host$request_uri? permanent;
}
#HTTP host for internal services
server {
    listen 127.0.0.1:80;
    listen [::1]:80;
    server_name localhost;
    server_tokens off;
    include /etc/nginx/includes/onlyoffice-documentserver-common.conf;
    include /etc/nginx/includes/onlyoffice-documentserver-docservice.conf;
}
## HTTPS host
server {
    listen 0.0.0.0:443 ssl;
    listen [::]:443 ssl default_server;
    server_tokens off;
    root /var/www/html;

    ssl on;
    ssl_certificate /etc/letsencrypt/live/yourdomain.com/fullchain.pem;
    ssl_certificate_key /etc/letsencrypt/live/yourdomain.com/privkey.pem;

    ssl_ciphers "ECDHE-RSA-AES128-GCM-SHA384:ECDHE-RSA-AES128-GCM-SHA128:DHE-RSA-AES128-GCM-SHA384:DHE-RSA-AES128-GCM-SHA128:ECDHE-RSA-AES128-SHA384:ECDHE-RSA-AES128-SHA128:ECDHE-RSA-AES128-SHA:ECDHE-RSA-AES128-SHA:DHE-RSA-AES128-SHA128:DHE-RSA-AES128-SHA128:DHE-RSA-AES128-SHA:DHE-RSA-AES128-SHA:ECDHE-RSA-DES-CBC3-SHA:EDH-RSA-DES-CBC3-SHA:AES128-GCM-SHA384:AES128-GCM-SHA128:AES128-SHA128:AES128-SHA128:AES128-SHA:AES128-SHA:DES-CBC3-SHA:HIGH:!aNULL:!eNULL:!EXPORT:!DES:!MD5:!PSK:!RC4";
    ssl_protocols TLSv1 TLSv1.1 TLSv1.2;
    ssl_session_cache builtin:1000 shared:SSL:10m;
    ssl_prefer_server_ciphers on;
    add_header Strict-Transport-Security max-age=31536000;
    add_header X-Content-Type-Options nosniff;

######  The lines below will allow LetsEncrypt and/or Certbot to obtain & renew SSL certificates
    location ~ /.well-known/acme-challenge {
        root /var/www/onlyoffice/;
        allow all;
    }
    include /etc/nginx/includes/onlyoffice-documentserver-*.conf;
}
This will tell Nginx to use ‘/var/www/onlyoffice/.well-known’ for acme-challenge requests.
service nginx start
service supervisor start
certbot certonly --webroot -w /var/www/onlyoffice -d yourdomain.com
Congratulations! Your certificate and chain have been saved at
/etc/letsencrypt/live/yourdomain.com/fullchain.pem.
The Document Server can now be accessed using HTTPS (port 443).
Community Server
https://helpcenter.onlyoffice.com/server/linux/community/switch-to-https.aspx
sudo service nginx stop
Taken from:
https://github.com/ONLYOFFICE/Docker-CommunityServer/blob/master/config/nginx/onlyoffice-ssl
It is suggested to use the file on the web page, but this is not a good fit and needs significant edits to make it work.
Instead, simply do this:
certbot certonly --webroot -w /var/www/onlyoffice -d yourdomain.com
This currently fails as we need to provide access to the “/var/www/onlyoffice/.wellknown” web folder to serve acme-challenge-response SSL traffic.
This folders looks empty, but is briefly used when an SSL connection is established.
At a later point in time you can monitor the contents of this folder if you are curious. You can use the following instruction to do so:
while true ; do ls -l .well-known/acme-challenge/ ; sleep 1 ; done
If you type in https://yourdomain.com in your internet browser or run certbot, you should see a SSL challenge-response key file appear here briefly.
Let’s continue enabling HTTPS step by step:
Original Nginx config file
cd /etc/nginx/available-sites
cat onlyoffice
#------------------
upstream fastcgi_backend {
    server unix:/var/run/onlyoffice/onlyoffice.socket;
    server unix:/var/run/onlyoffice/onlyoffice2.socket;
    keepalive 64;
}

fastcgi_cache_path /var/cache/nginx/onlyoffice
    levels=1:2
    keys_zone=onlyoffice:16m
    max_size=256m
    inactive=1d;

server {
    listen 80;
    add_header Access-Control-Allow-Origin *;
    include /etc/nginx/includes/onlyoffice-communityserver-*.conf;
}
#------------------
Certbot compatible Nginx config file
Modify the files as follows:
#------------------
upstream fastcgi_backend {
    server unix:/var/run/onlyoffice/onlyoffice.socket;
    server unix:/var/run/onlyoffice/onlyoffice2.socket;
    keepalive 64;
}

fastcgi_cache_path /var/cache/nginx/onlyoffice
    levels=1:2
    keys_zone=onlyoffice:16m
    max_size=256m
    inactive=1d;

server {
    listen 80;
    add_header Access-Control-Allow-Origin *;
    include /etc/nginx/includes/onlyoffice-communityserver-*.conf;

location ~ ^/.well-known {
        allow all;
    }
}
#------------------
Now we can test certbot again.
sudo service nginx start
certbot certonly --webroot -w /var/www/onlyoffice -d yourdomain.com
Congratulations! Your certificate and chain have been saved at
/etc/letsencrypt/live/yourdomain.com/fullchain.pem.
Now we can complete the steps to enable HTTPS traffic on port 443.
sudo service nginx stop
cat onlyoffice
Modify the file as follows:
#------------------
upstream fastcgi_backend {
    server unix:/var/run/onlyoffice/onlyoffice.socket;
    server unix:/var/run/onlyoffice/onlyoffice2.socket;
    keepalive 64;
 }

fastcgi_cache_path /var/cache/nginx/onlyoffice
    levels=1:2
    keys_zone=onlyoffice:16m
    max_size=256m
    inactive=1d;

## Normal HTTP host
server {
    listen 0.0.0.0:80;
    listen [::]:80 default_server;
    server_name _;
    server_tokens off;
    ## Redirects all traffic to the HTTPS host
    root /nowhere; ## root doesn't have to be a valid path since we are redirecting
    rewrite ^ https://$host$request_uri? permanent;
}

#HTTP host for internal services
server {
    listen 127.0.0.1:80;
    listen [::1]:80;
    server_name localhost;
    server_tokens off;
    include /etc/nginx/includes/onlyoffice-communityserver-*.conf;
 }

## HTTPS host
server {
    listen 0.0.0.0:443 ssl;
    listen [::]:443 ssl default_server;
    server_tokens off;
    root /var/www/html;

    ssl on;
    ssl_certificate /etc/letsencrypt/live/yourdomain.com/fullchain.pem;
    ssl_certificate_key /etc/letsencrypt/live/yourdomain.com/privkey.pem;
    ssl_ciphers "EECDH+AESGCM:EDH+AESGCM:AES256+EECDH:AES256+EDH";
    ssl_protocols TLSv1 TLSv1.1 TLSv1.2;
    ssl_session_cache builtin:1000 shared:SSL:10m;
    ssl_prefer_server_ciphers on;
    add_header X-Content-Type-Options nosniff;

    include /etc/nginx/includes/onlyoffice-communityserver-*.conf;

    ######  The lines below will allow LetsEncrypt and/or Certbot to obtain & renew SSL certificates
    location ~ ^/.well-known {
        allow all;
    }
}
#------------------
(!) The instruction “include /etc/nginx/includes/onlyoffice-communityserver-*.conf;” instruction needs to be placed ABOVE the instruction “location ….well-known” instruction for HTTPS to work.
Congratulations!
You now have Community Server and Document Server running natively on two hosts using Debian 8 Jessie using certbot (Let’s Encrypt) for HTTPS.
Connect to your ownCloud/Nextcloud storage
Now that we have ONLYoffice Community Server up and running, you can ‘map a network drive’ as it were and connect to your ownCloud/Nextcloud storage. Simply click on the “Connect Nextcloud account’ button and enter the Nextcloud server details:
| Server: | https://yournextcloudserver.com/remote.php/webdav |
| Username: | Nextcloud user ID |
| Password: | Nextcloud password |
| Description: | The label used to display this connection |
Note that the URL address for the Nextcloud server is not 100% identical to the actual server name as we need to connect to the WebDAV interface.
Thank you
If this article was useful to you and you would like us to keep writing articles like these please buy us a beer by visiting https://tablelandscomputers.com/services and click on the ‘Pay Now’ button.
If you need help configuring your server, contact us any time!