Disabling automatic hard disk scan and repair (‘checkdisk’).
During Windows startup, you will be given a couple of seconds, during which you can press any key to temporarily skip repairing and scanning of [C:].
Using an administrative command prompt you can manually scan a hard disk for errors using the following commands:
chkdsk C: /x /f /r
sfc /scannow
If you want to cancel automatic hard disk scan and repair in Windows 8 altogether, here is how you can do it.
Using Registry Editor
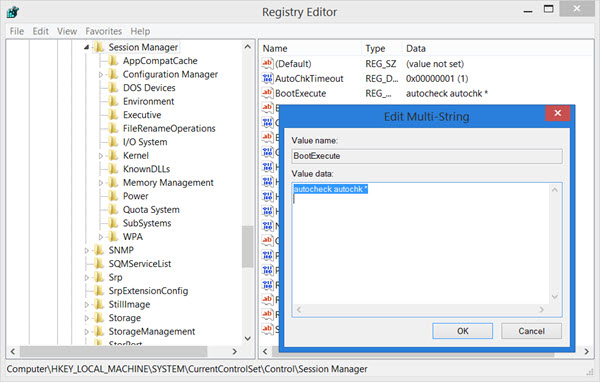
Run regedit to open the Registry Editor and navigate to the following key:
HKEY_LOCAL_MACHINE\SYSTEM\CurrentControlSet\Control\Session Manager
Change the BootExecute entry from:
autocheck autochk * /r\DosDevice\C:
To:
autocheck autochk *
…or remove this entry completely to disable this feature altogether.
Close the Registry Editor and restart your computer. Automatic hard disk scan and repair will not run.
Using Command Prompt
To cancel a scheduled automatic hard disk scan and repair operation, open an elevated command prompt window and enter the following command:
chkntfs /x c:
This should cancel the scheduled operation.

