Safe Mode in Windows 8 and Windows 8.1 is not too different from the Safe Mode found in earlier versions of Windows.
The operating system still loads only the most basic drivers and services, so that it can display a minimal useful interface. The only important difference is that the minimum screen resolution used by Safe Mode has risen from 800×600 pixels to 1024×768 pixels.
1. Use msconfig.exe
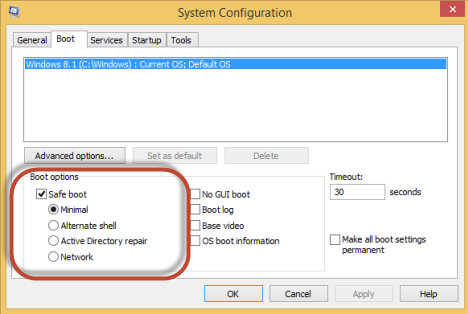
The easiest method for booting into Safe Mode is to use the System Configuration tool, also known as msconfig.exe.
Go to the Boot tab and, in the Boot options section check the box that says “Safe boot”. Then, click or tap OK.
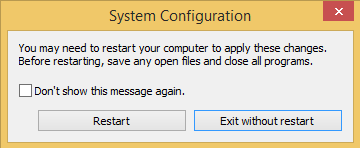
You are informed that you need to restart your computer. Click Restart or Exit without restart depending on whether you want to restart now or later.
At the next restart, Windows 8 and Windows 8.1 start in Safe Mode.
2. Use Shift + Restart
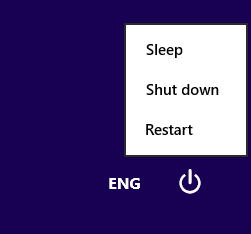
Another method is to press the Power button at the Windows login screen or in the Settings charm. Then, press and hold the SHIFT key on your keyboard and click Restart.
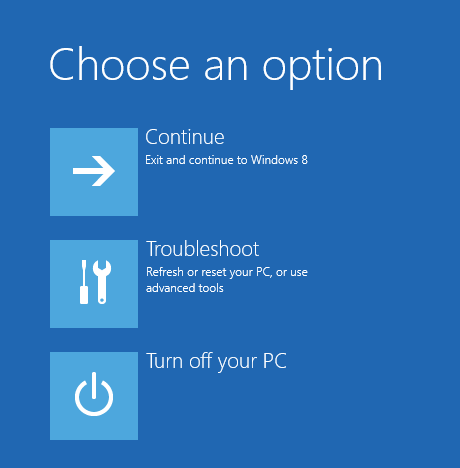
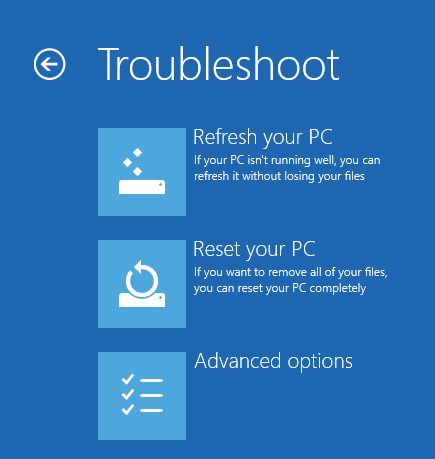
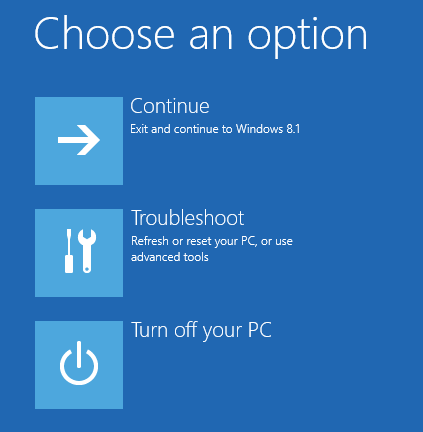
Windows asks you to choose an option. Press Troubleshoot.
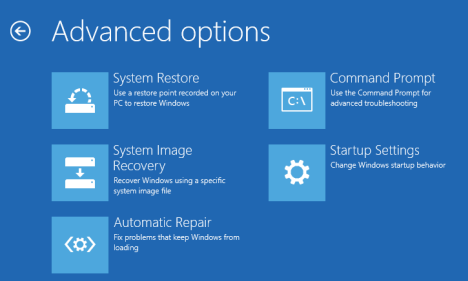
In the Troubleshoot screen, press Advanced options.
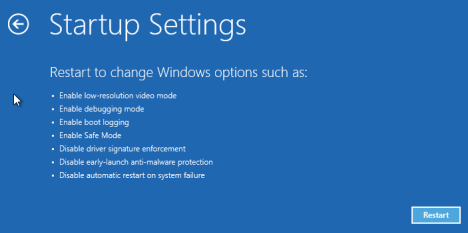
In the Advanced options screen, press Startup Settings.
You are informed that you are about to restart in order to change several Windows options, including enabling Safe Mode. Press Restart.
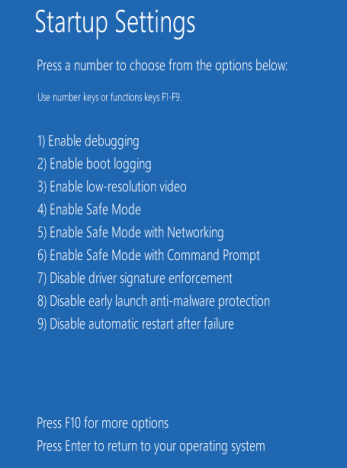
Your computer or device restarts again and displays nine startup settings, including Safe Mode, Safe Mode with Networking and Safe Mode with Command Prompt
Press the F4 key on your keyboard, to enable Safe Mode, F5 to enable Safe Mode with Networking and F6 to enable Safe Mode with Command Prompt. Windows 8 and Windows 8.1 now boot according to the setting you selected.
3. Recovery CD/DVD
In Windows 8, but not in Windows 8.1, you can create a system recovery CD or DVD. Once you have that disc created, boot from it. When asked to press any key to load its content, do so.
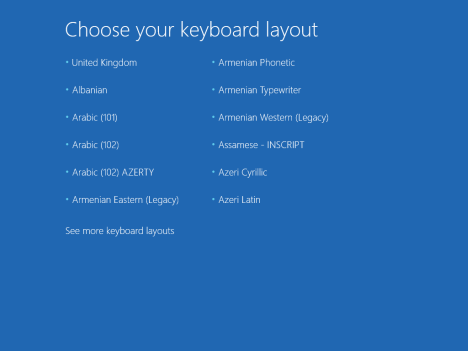
First, you are asked to choose your keyboard layout. Press the layout you want to use. If you want to browse through the available options, press “See more keyboard layouts” until you find the one you want to use.
Then, the Choose an option screen is shown.
From here on, the steps are identical to those shown for method 2.
4. Recovery Memory Stick
In Windows 8 and Windows 8.1 you can use the Recovery Media Creator to create a system recovery drive on a USB flash Drive.
Boot from the USB memory stick and follow the same instructions as in method 3.
5. Use F8 or Shift + F8
In Windows 7, you were able to press F8 just before Windows got loaded, to open the Advanced Boot Options window, where you could choose to start Windows 7 in Safe Mode.
Some websites advise you to press Shift+F8, just before Windows 8 or 8.1 starts loading so that you make it start the recovery mode, from where you can boot into Safe Mode. The problem is that, most times, Shift+F8 and F8 don’t work, even though they are correct commands, supported by Windows 8 and Windows 8.1.
This official blog post from Microsoft explains that this behavior is caused by their work in designing a very fast boot procedure:
“Windows 8 has a problem – it really can boot up too quickly. So quickly, in fact, that there is no longer time for anything to interrupt boot. When you turn on a Windows 8 PC, there’s no longer long enough to detect keystrokes like F2 or F8, much less time to read a message such as “Press F2 for Setup.” For the first time in decades, you will no longer be able to interrupt boot and tell your PC to do anything different than what it was already expecting to do.”
If you have modern PC with a UEFI BIOS and a fast Solid State Drive (SSD), there is no way you can interrupt the boot procedure with keypresses. On older PCs, with a legacy BIOS and a common Hard Disk Drive (HDD), pressing these keys might still work though.

