Google MyBusiness
Add your business to Google My Business to have it show up in Google Search as business. You will be required to verify your business details via postal mail. You can upload a profile picture and a logo picture. You can set a location on the map and list business opening hours. These steps will improve your business’ visibility on the internet.
Google Webmaster Search Console
Search Console is a free service offered by Google that helps you monitor and maintain your site’s presence in Google Search results. You don’t have to sign up for Search Console for your site to be included in Google’s search results, but doing so can help you understand how Google views your site and optimize its performance in search results.
In order to verify ownership of a website, adding a TXT record in DNS to verify ownership is preferred. If we register a domain name and host a website for you, we will look after this so you don’t have to. Additionally, if you provide us with a Google account we can give you access to the Google Webmaster Search Console if preferred. We also register your website with Google reCaptcha for Contact-Us form validation. Please note that Google Webmaster Search Console is an external product and not part of any domain name registration or web hosting service. We can however assist you with any Google Webmaster Search Console related queries.
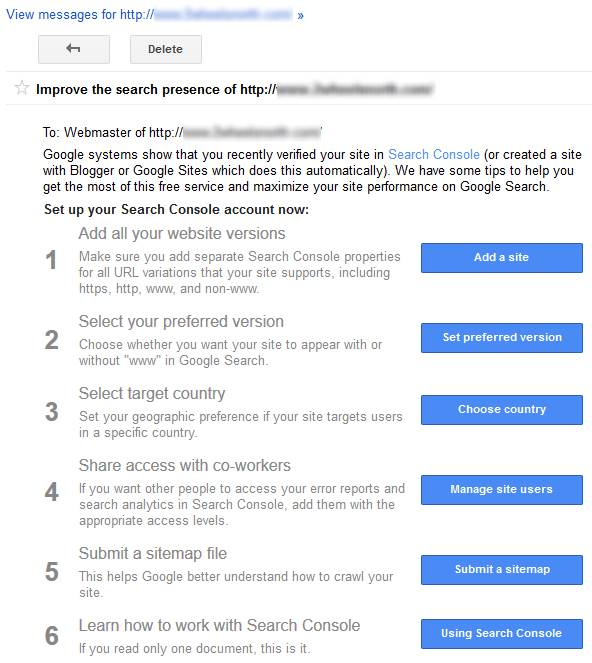
Once the website is registered with Google Webmaster Search Console, the following requires attention:
The first thing to do is add http, https, www and non-www site addresses to the Search Console. This will ensure all variations of our website are indexed.
Setting a geographic area as a preference is useful to target the country of residence. Search Console is most likely able to determine this by analyzing the website content at a guess.
Submitting a sitemap file is preferred. Even if all website content can be found by following the links on the main page, simply having a sitemap submitted probably ticks a box and improves your ranking.
Search Engine Optimisation
The real purpose of SEO is to help people who are looking for your business to be able to easily find you. In order to achieve that, you have to match the content on your website to what people are most likely trying to find.
Search engines have bots that automatically crawl your website, “reading” it to find out what it’s about and then deciding which keywords each of your pages should rank for. You can influence their “decisions” by strategically optimizing your content for certain keywords.
This is especially true if you’re creating content that bots can’t read. It’s easy for bots to interpret text, but they aren’t advanced enough yet to watch videos, look at images, or listen to audio. You’ll need to describe them, so they bot can understand and rank your pages for the appropriate keywords.
One quick word of warning, though.
Writing solely for search engines usually makes your content boring, and typically, that won’t help convert your visitors into customers. It’s far better to focus on people first, making your content as easy as possible, and then optimize for search engine bots where you can, without sacrificing the persuasiveness of your content.
Pay attention to:
- Titles – Create eye-catching titles that raise the reader’s interest. You only have one chance to make a great first impression.
- Permalink – The address (URL) of an article on your web site.
- File naming – The file name and title of pictures or documents on your web site.
- Keywords – Pick keywords that will help bring people to your site and are relevant.
- Links – Link to quality sites that compliment what your website is about. It’ll encourage sites in your niche to link to you as well.
- Quality – Try to publish unique and quality content. This prompts users to come to your site because they cannot easily find the content elsewhere.
- Freshness – If you are publishing content that does not age or become outdated, that’s great, but you also need to add new content on a regular basis.
- Mobile Usability – Make sure your website loads properly on a small screen mobile device.
- Page load speed – Slow loading websites are likely penalized in page ranking.
- Title, Description and Keyword tag – Make sure the information in these tags accurately reflects the page contents.
- Headings – Make sure to use headings and use them in the correct order <h1>, <h2>, <h3>, etc.
And most importantly, do not publish someone else’s content on your site. This creates duplicate content, and search engines can penalize you for it.


