Apple iPad Mini – Magnets

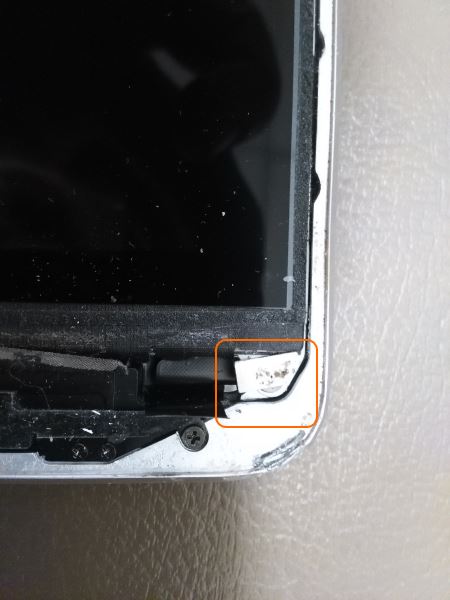
Whenever you replace a damaged touch screen on an Apple iPad (mini), don’t forget to put back the magnets.  The magnets are used in combination with “smart” covers that use magnets to attach to the iPad’s built-in magnets.

If you place the Apple iPad down flat with the camera at the top and the home button at the bottom, and with the screen facing you, the magnets are located in the top right hand side and bottom right hand side.  Think about how you open and close a book – this is is where you want to place the magnets; on the right hand side.

iPad mini magnet 1 iPad mini magnet 2

Toshiba All-in-One LX830 hard disk replacement

  1. Lay the device with the screen facing down flat on a soft cloth or blanket.
  2. Remove the 5 main screws.
  3. Remove a small screw from the back of the device holding the optical drive in place.
  4. Slide out the optical drive.
  5. Remove the memory access door to reveal an additional screw.
  6. Open the cover hiding the wireless mouse/keyboard USB dongle.  Remove the dongle to reveal an additional screw.
  7. Remove the rubber grommet in each leg to reveal two additional screws.

The back of the case is held in place by clips around the whole perimeter. Be very careful and patient and gently pry the two half’s of the case apart.  It is easiest to start where you removed the optical drive and move the parts by horizontally pushing /pulling and in opposite direction rather than pulling them apart vertically.  Once you release a single plastic clip they just seems to “pop” off one by one.

You can now access the hard disk located under a metal shield covered in metal foil sticky tape.

You can replace the Seagate 3.25 inch 1TB 20mm thick hard disk with a conventional WD 3.25 inch Caviar Blue 1TB 7200RPM 25mm thicker one.

Toshiba LX830 all-in-one internals Toshiba LX830 all-in-one hard disk

iMac Intel 27″ EMC 2309 and 2374 Hard Drive Replacement

  1. Locate the EMC number on a label attached to the bottom of the stand.
  2. Lookup the make and model of hard disk drive installed and source a suitable replacement.
  3. Use suction cups to remove the Glass panel.
  4. Remove the eight T10 Torx screws securing the LCD to the outer case.
  5. Slightly lift LCD screen and unplug connectors.
  6. Rotate the display out of the outer case enough to carefully disconnect the remaining connectors.
  7. Rotate the LCD display vertically or remove altogether.
  8. Optionally remove thermal sensor sticky taped to hard disk
  9. Replace hard disk drive.

iMac Intel 27inch LCD display

iMac Intel 27inch internals

iMac Intel 27inch hard disk